
Click Now Bangla Translate
All right, so first off, we're going to start on our YouTube page. This happens to be my page, Creator Fundamentals. If you have not yet subscribed, consider clicking that button ringing the bell and turning on notifications so you're alerted to future videos that can help you grow here on YouTube. So from your main YouTube page, we are going to click on Customize Channel. You can also click on Manage Videos. Both of these buttons are going to bring you into the backend that is known as YouTube Studio. You can also click on your icon in the upper right hand corner and go to YouTube Studio there as well. So there's plenty of ways to get into YouTube Studio. We'll use this version for now because that's the one we're on. This is YouTube Studios. This is behind the scenes. This is where you're going to check out how your channel is performing.
Click Here
But we're going to focus our attention the most over here in the left hand menu for customizations. This is kind of a helpful part to be aware of, especially when you're setting up your YouTube channel because this is where you're going to control the look and feel of your YouTube channel. So on the branding tab we see right here we have both our picture, our icon for our channel right here. You can change or remove it here. And then we have our channel banner. So this is where you upload your banner image. Now the important thing here, I see a lot of people who just upload a picture and you really need to understand that there is a specific size that this image needs to be. In this case it tells you it's 2048 by 1152. So that's the size of the image that you need to upload.
Now the thing to remember is that even though they've given you that size, that size is basically what would appear on a full-size TV display. The part of it that appears on a browser is just basically the center bar of that channel art that you've uploaded. So you really want to get a better idea of that. I actually use Canva to do all of my graphics and you can go to trycanvapro.today to check that out. It is, they do have templates there specifically for channel art. So you can see the portion in the middle of the actual oversized image that's going to appear on browser and on mobile. So you want to make sure all the elements that you put in your channel art are not going to get cut off if somebody's viewing it on browser or on a TV or on a desktop, etc.
So that's where you can start there. And then also down here you have your video watermark. If you've ever seen that icon in the lower right hand corner of a YouTube video, when you hover over it, it gives you a subscribe button. So it's a great way to be able to add a subscribe functionality within the video itself. Now you can put any picture that you want there if you just want to use it as a watermark and it could just be a logo. But using a subscribe graphic such as this one can allow you to basically serve two different purposes. You have that there as your watermark, but people can also hover over it and subscribe to your channel right in line. Now there's a specific dimensions for that video or that icon to appear. They want it to be semi-transparent.
You can actually go to one of my videos here, which is how to add a YouTube subscribe watermark to your video for free. And I'll actually put a link at the end of this video. You can check out that video and I'll show you how to get that graphic for free over on my website, tubetemplates.com for affordable YouTube graphics. So in that case, you just click change or remove, and then you navigate to the graphic that you've saved on your local computer. And then you select it, hit save. It'll pop up in there. Once you've made all these changes, you want to make sure that you push publish. This will change the color. Once you have a change that needs to be saved, you want to make sure that you do. You hop up here and click publish. So those changes are in effect.
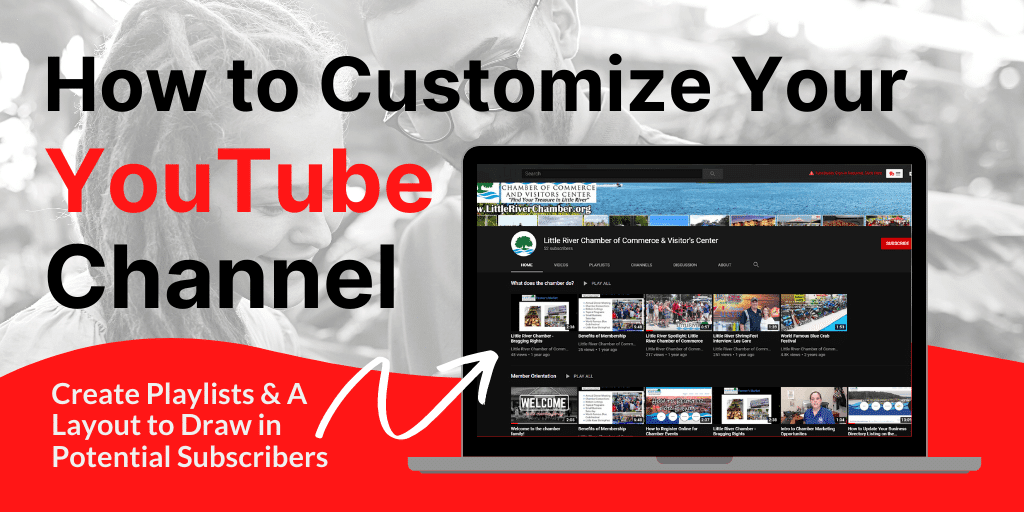
And then what you can do is if you click view channel, it'll pop you over to a new tab and show you what changes that you've made to your channel. So I was talking about your channel art and all that. So as you can see here, this image is actually, it goes way up off the up here and down here, but you're only seeing basically the middle stripe of it. This text is purposely only in the center of the center so that when this gets shown on mobile, that none of the graphics get cut off. And I'm actually, let's see if we can do this here and get it so you can actually see it. All right. So you can see here on mobile because everything is centered, that it looks nice and neat and it is centered in the middle of the image.
Now if we hop back over to the desktop version, you'll see that there are some additional graphical elements, but they're placed in such a way that they don't get cut off when this is sized down to mobile. So those are just some things you want to think about with your channel art to make everything look nice and clean and professional and make it look like you know what you are doing. Don't let the learning stop here. I'm going to put a video on the end screen now that's going to help you to continue to learn how YouTube works and how you can use it to grow your channel and make revenue so you can create your freedom. I'll see you in the next video.


0 Comments